


How to define your DNS RPZ Zones for logging

ISC and Spamhaus define their steps for RPZ logging for BIND firewalls as follows
- Enable RPZ logging
- Define your zones in the config file
- Local zone
- Master zone
- Slave zones
- Formally enable the RPZ Zone Policies
- [Important] Restarting the NAMED DNS-Resolver service
- Verifying the log-file is recording.
We can see that a large portion of these steps is defining various zones (including the local, master, and slave zones) in your "named" configuration file (named.conf).
Before You Begin
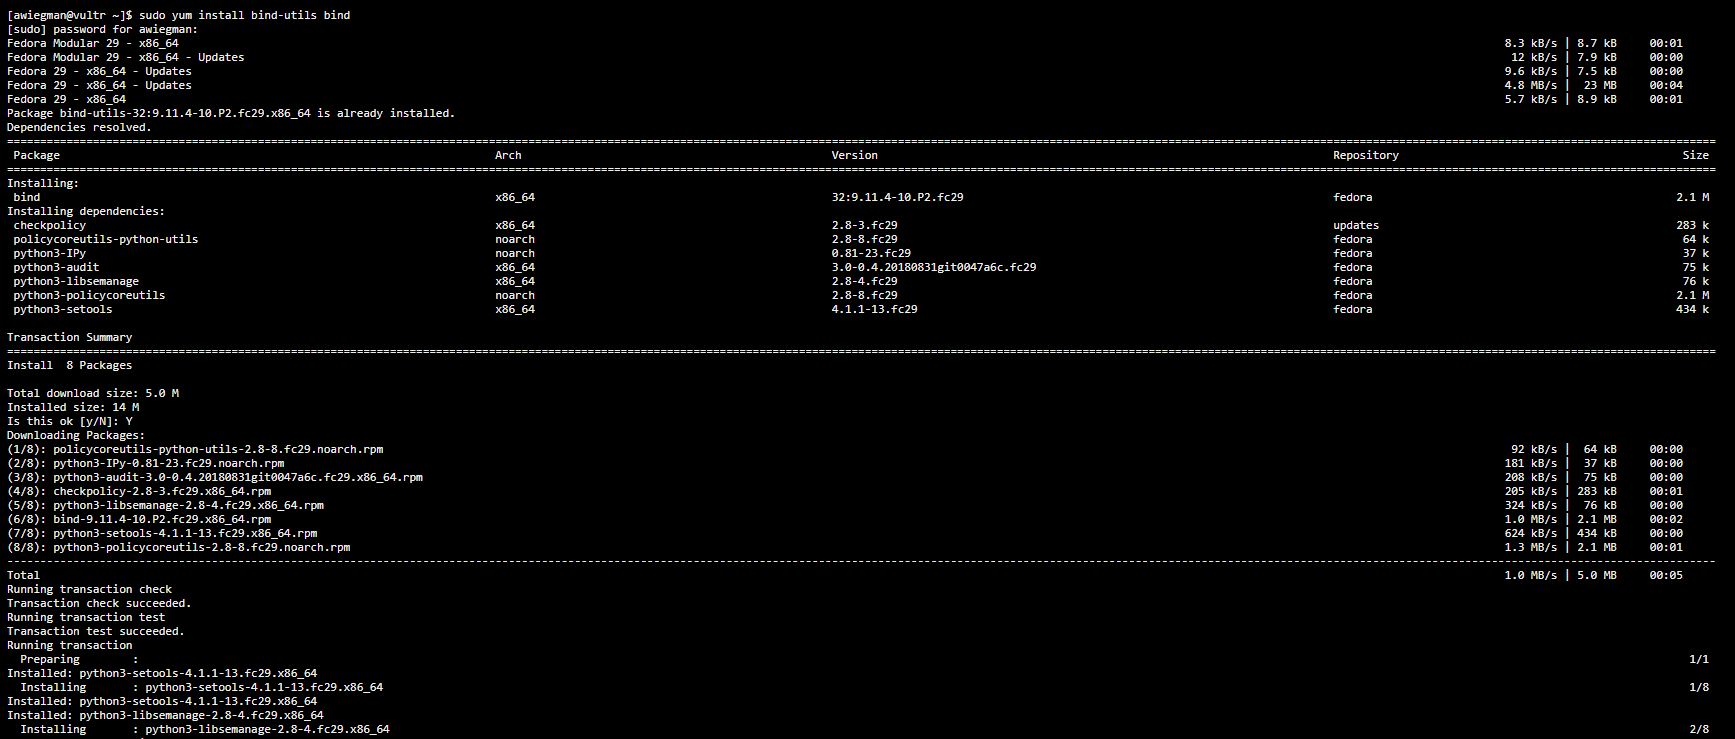
- The following steps and files are not native to most installs of Fedora, CentOS, Debian, or otherwise. You should run "sudo yum install bind-utils bind" from your nearest terminal with the administrative user account (no requirement to use root account).
This command will give you access to the necessary libraries. As of the time of writing in late February 2019, this command will provide you with BIND v9.11, which is a compatible and supported version for Spamhaus/Pipeline RPZ logs.
- If you see the following sort of screen, all is well.
Enabling RPZ logging
The follow along in the video resource can be opened here:
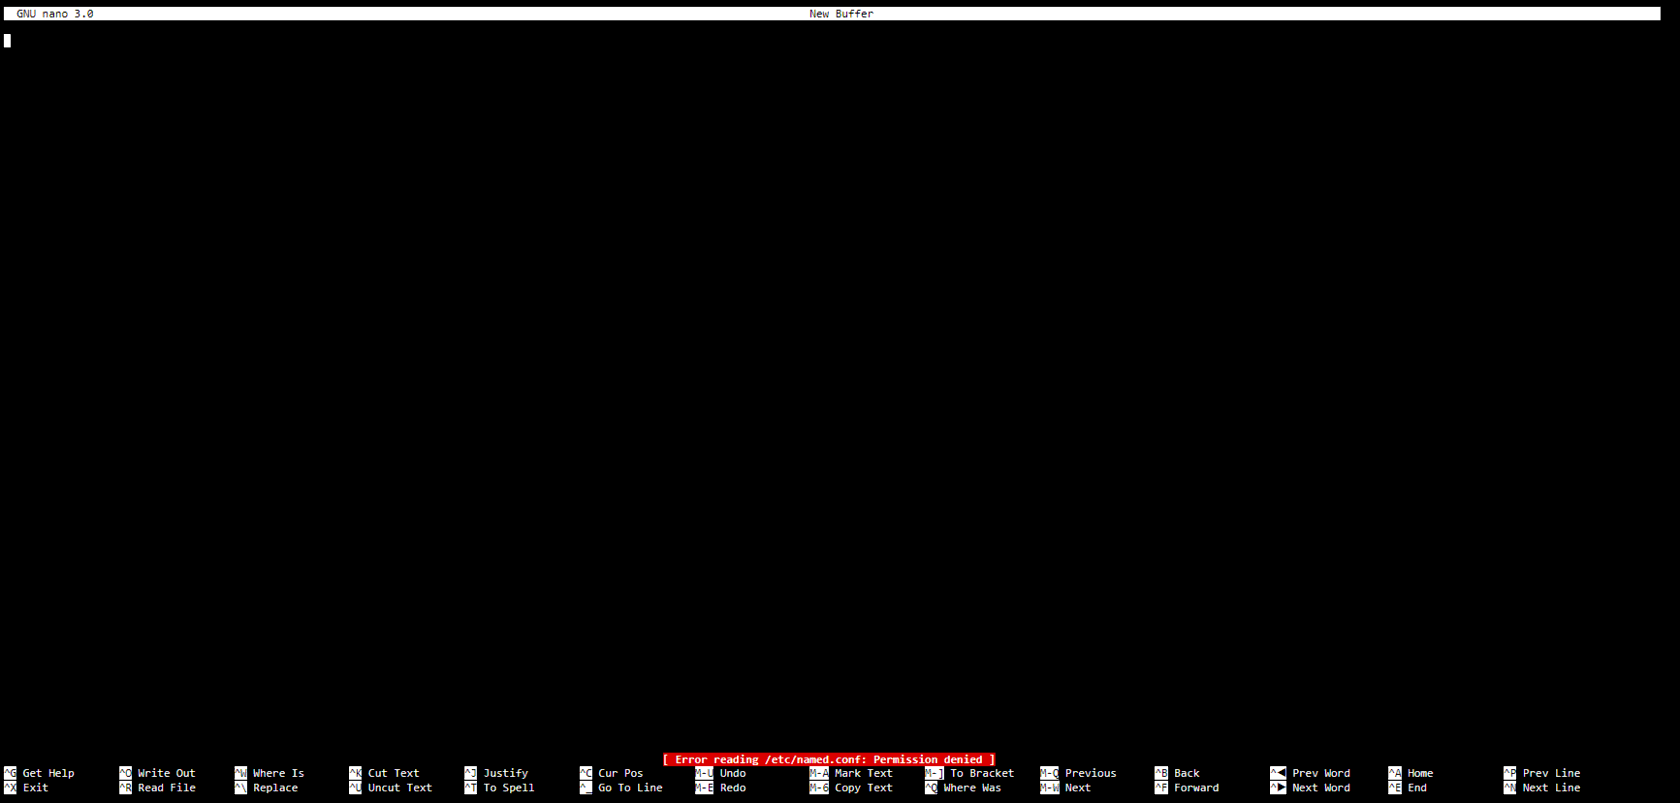
- We will need to add a few lines to named.conf (the configuration file for BIND Named) in the etc directory.
- IMPORTANT: Opening the file as any non-root user, including administrative users, will result in a Permissions Denied error. Sign out of your current terminal session and log back in as root!
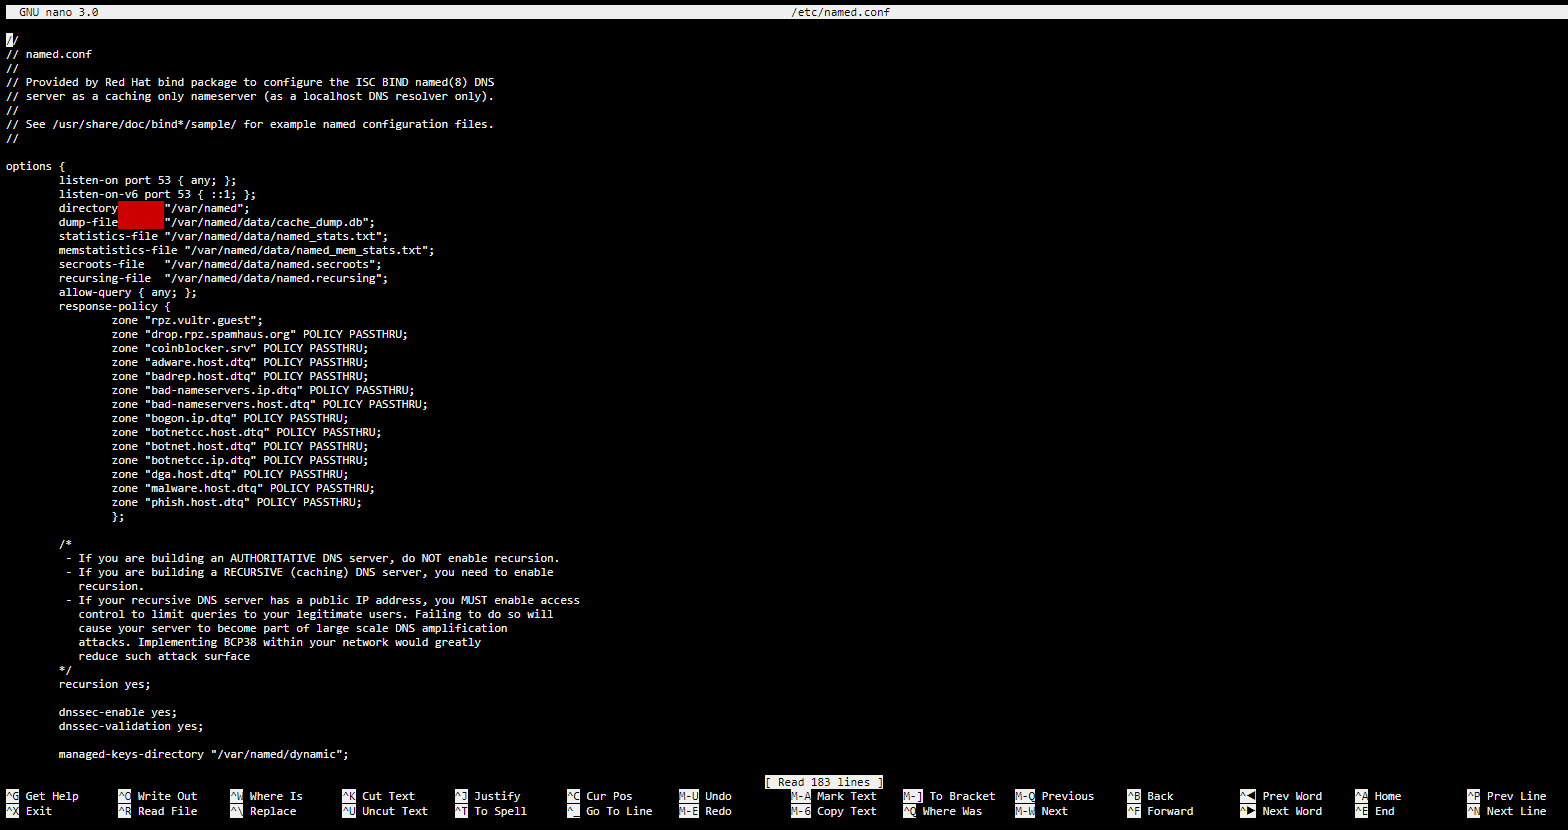
3.By default, the second major section is about the logging policy. It will look something like the following (example from Fedora Server v29):
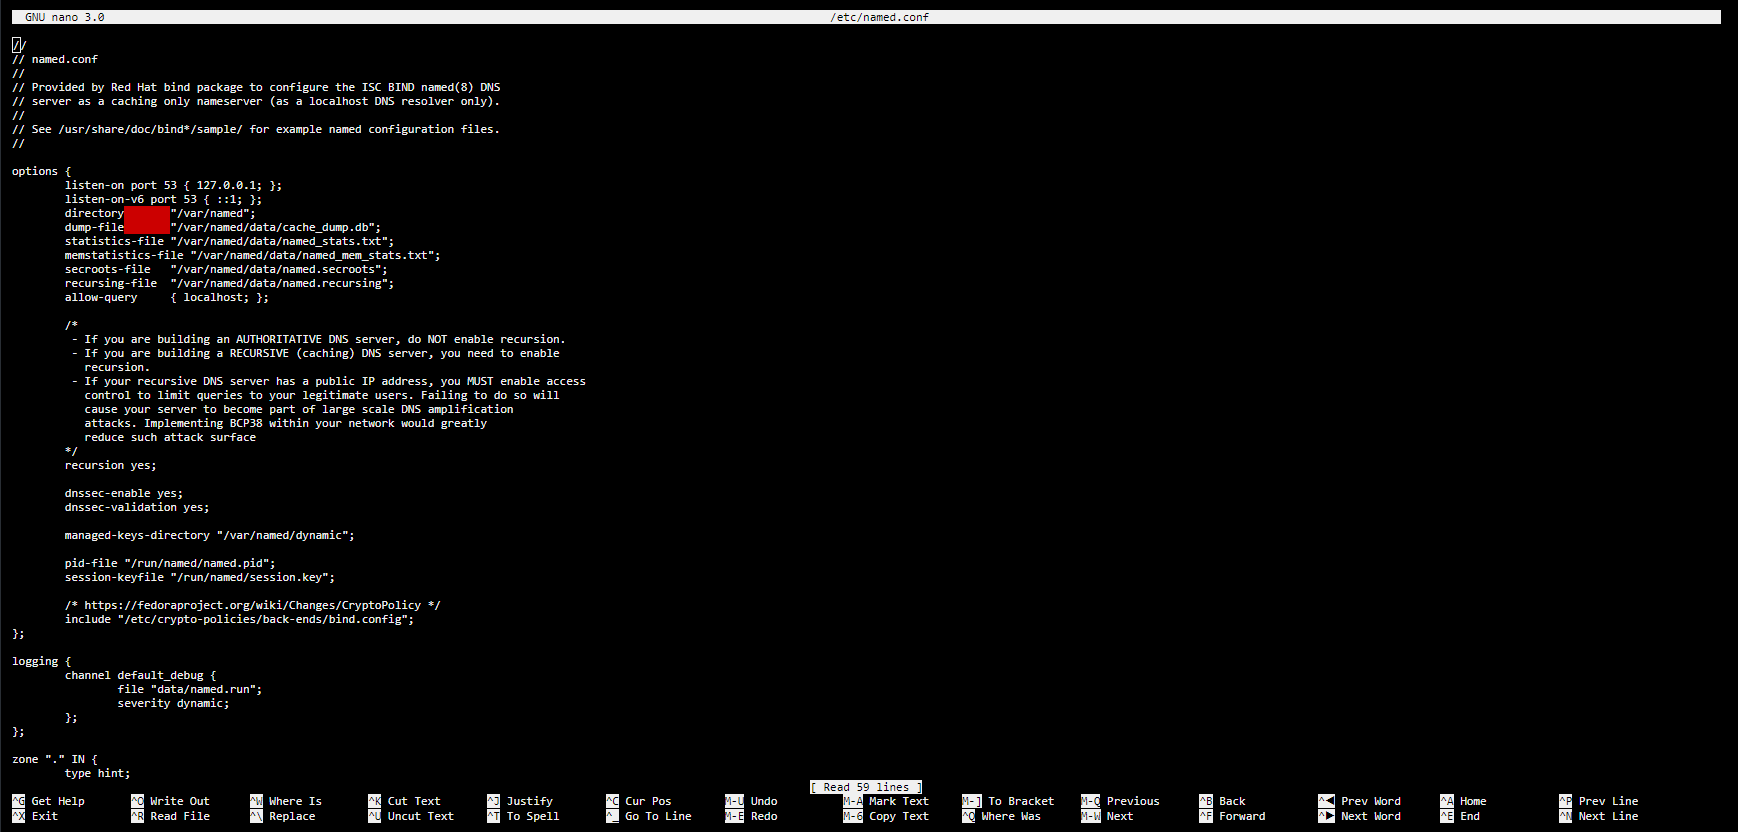
4.We will change that section to enable the creation of an rpz log file of a large size (we define ~1gb for the file), with timestamps, category, and severity info – in addition to any other message.
- These options are flexible, but this is one common method for setting up the records-keeping log files.
Defining your Local Zone
The follow along in the video resource can be opened here and here:
1. IMPORTANT: You will not be able to change directory (cd) to the /var/named directory that these files are in without logging in as the root user. Administrative users (and lower) will see a Permissions Denied error and cannot proceed!
2. The first step to creating a (modified) local zone is copying the file named.localhost to rpz.db. Type in cp named.localhost rpz.db your terminal session.
- This command will produce no output, but the copy has now been made. You may delete the file and start again from scratch if something goes wrong.
- If you must reset your local zone file to solve a complicated issue, running rm -rf rpz.db and cp named.localhost rpz.db (a repeat of the above) should allow you a new start.
- We suggest the Linux programs nano or vim to open the files for editing. This tutorial uses nano.
3. What you name your localhost region is a free choice, but we suggest either the standard localhost.rpz.local. or the machine's hostname ([hostname].local.rpz.)
- Whichever you decide to use, it must end with a full-stop (.) character.
- Most space-formatting uses tab. Using the space bar will probably result in a broken file-reading process.
4.The serial number will usually be a date-string, formatted (YYYYMMDD).
5.You first add the whitelist domains and IP addresses that you will use for daily work activities.
- Add domains in their entirety (using wildcard key (*) subdomains) or as individually listed subdomains. Add IP[v4] addresses with the format [IPv4 Address].[Port Number]. From what we have tested, the port number is a requirement.
- Set their CNAME values to rpz-passthru, the default preset in Spamhaus lists for allowing domains and IP addresses.
6.Similarly, you follow by adding custom domains and IP addresses that your organization wants to block explicitly (that are not a part of any Spamhaus or Pipeline block-lists).
- You can set these CNAME values to . [full-stop character], and they will fail to resolve past your BIND Named firewall.
- You might also consider adding domains and IP addresses that are known phishing sites for your organization, although most of these are likely to be in one of the Spamhaus / Deteque block-lists.
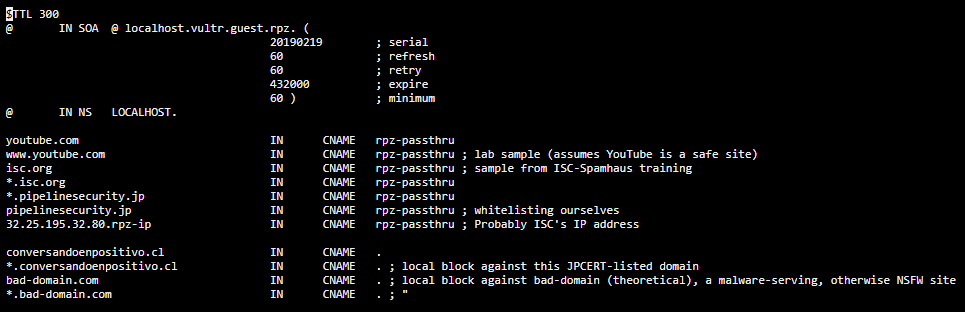
7. An example local zone file might look like the following:
8. Pressing Ctrl+X keys, Y key, and Enter key in that order will save and close the file in nano.
Defining Master and Slave Zones
The follow along in the video resource can be opened here (Master) and here (Slave):
- There is a default Master zone already available in the named.conf file, but this will be changed.
- Refer to the following example of a default named.conf file (from Fedora Server v29):
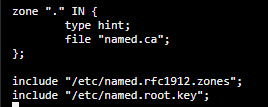
- For the section starting with zone and ending at the }; four lines later, remove what is there and instead type in the following:
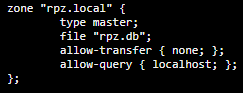
This allows us to create a Master Zone called rpz.local which will update the local zone. The transfer and query options are suggested to be set to the above values to limit usage to the DNS resolver.
While you may name the Master Zone as you please, the file (3rd line) should be the same name as the local zone file you created in the previous step.
2.You then must add Slave Zones, which will pull rules from the Spamhaus primary lists' server and download them to your local machine(s) at a given update interval.
- These will follow in lines after the Master Zone and be ordered in priority of what should be blocked most.
- There is a list of different RPZ files that Spamhaus offers, but note that you must have a license and your machine(s)' (hopefully, static) IP address needs to be registered to a usage license for this step to complete successfully.
A potential error situation might look like the following:

IMPORTANT: The IP addresses in the video tutorial are no longer correct. Please correct them to the values in the below picture.

The picture above shows examples of some slave zones. You start with the name (defined in the Spamhaus docs), define it as a slave zone in type, make a name for the file (I use db.[feed-name]), list the Master Zone server IP addresses, and set transfer and query as before.
Enabling the RPZ Zones' Policies
- This is done by adding a list of your MASTER and Slave zones as a response-policy in the options section of you named.conf file.
IMPORTANT: For the Slave (but not the MASTER) zones, append POLICY PASSTHRU to each zone so that the whitelist and blacklist settings from your local zone (rpz.db) file are logged in test-mode. REMOVE the PASSTHRU part of each line when you have successfully tested each zone and want to enforce it.
Restarting the NAMED DNS-Resolver service
IMPORTANT: Without a restart of the NAMED service, no changes will be reflected in the Internet name resolution, including even after setting all of the above options.
- An unsuccessful restart will show the following message. Type journalctl -xe to see more details on the problem.

- A successful restart will show the following.

Verifying the RPZ Log
- As we can see, the various zones were loaded and the IP addresses within them, domain names, and query names were added to the master zone DNS resolution file.


Building a Smart Security Pipeline
Gain a new level of insight and knowledge across your organization to speed up decision making and business actions.
